Monday, July 13, 2009

The problem with HotBodies T Bars


Associated on the left... Hotbodies on the right. Who is right here?

Hmmm: I chased this problem around for a good few meetings until I realised what was going on. The problem with being pedantic is that sometimes you can spend more time tring to fix problems that may not actually be a problem. Now I realise the issue... I buy Associated T-bars.

The issue basically is that the HB Tbar is not really very accurate. The main larger holes that locate the pivot ball mouldings are oversized leading to a possible error in the alignement of the Tbar. This in turn means that your rear axle ends up not being at 90 degrees to the car's centre line.

The HB and associated pivot mouldings are the same size but the pictures clearly show that the holes in the HB T-Bar are larger. I have found the error to be as large as 0.75mm with the pivot ball moulding slopping around in the T-Bar. This may not sound a lot but in a tap on the rear end the T-bar will be pushed to one extreeme on one side and the opposite extreme on the other leading to a 1.5mm difference over the length of the T-bar pivot spacing.

Once you amplify this over the length of the rear track width you can end up with the left and right wheel base being out by 2-3mm!

There are two ways to see this. One way is to measure the distance from the backmost surface of the rear pod bulkheads to the rear line of the cell slots on the chassis. I would seriously worry if you see much more than a 0.2mm difference here.


Another way is to use a straight edge along the rear wheel rims projecting forward to the outer limit of the front axle. This method assumes you have 100% correctly centred your rear axle on the Pod. If the rear track is centred on the pod you should be able to "eyeball" the same gap between the rule and the front axle when projecting forwards on the left and right sides.


I must admit that I have made a pair of accurate setup wheels to do this by skimming the Hotbodies wheels that come in the kit on my lathe. If you dont have accurate rims the use the first method.

Sunday, July 12, 2009

Andy Moore's 12th Damper Trick

I picked up this tip at the 2009 1/12th Euros in Italy. I had the pleasure of pitting with Andy and John Moore. My meeting was a total disaster but I came away with one thing having stolen Andy's HB C12X a few times to try and work out why mine was soooo bad!


This trick uses self adhesive teflon tape to make the damper plate and damper discs on a traditional Associated type rear end as smooth and consistent as possible. You get great damping without snatching.


The tape is hideously expensive (£50 per roll!). If you are in the UK and want to come to one of our nationals, I will give you some!

So... its easy. You degrease your carbon damper plate and stick an oversized piece of the teflon tape to the top and bottom surfaces.


Next cut out the hole in the middle with a sharp scapell knife. Finally use one of the damper discs as a template to cut around to trim the teflon tape to the same size as the damper disc itself

Job done. Reassemble and use your normal damping lubricant (Associated diff grease in my case). Hey presto! Feel the smoothness ;-)
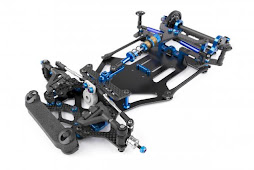





Thanks to Andy Moore for the idea. Now you know......